Monday, February 28, 2011

Fresh Start for a Vintage Spice Rack

I liked this little spice rack - especially the bottles it held!  I had a plan in mind for the clear glass gems with their little stoppers. Well worth the $2 I spent on the set at a yard sale.  So the bottles found new uses, while the wooden rack got tossed in my stash of future projects.  That was 2 years ago...or maybe 3.  It caught my eye when I was rummaging through the stash last week and I decided its time had come.
The rack was shabby/shoddy for sure.  Besides the expected scratches and dull finish from years of use, one of the wooden slats across the back was scotch-taped on. Lovely. and there was a small hunk of wood missing from one corner of the tiny drawer.
  
A good cleaning, sanding and wipe down, along with wood glue and a couple of tiny brads to replace the tape, and it was ready to paint.

I used Krylon's Blue Ocean Breeze spray paint - the perfect backdrop to the pure white milk glass spice jars I had kept from another spice rack project.  My original plan was to distress and antique...but the freshness of the blue just deserved to be left as is.  The antique-look can come naturally over time, or by design at some point in the future if I change my mind.
 
I love that little drawer at the bottom!  It's the perfect size to hold small items like matches or keys.  I couldn't resist adding a surprise pop of color to the bottom of it with some scrapbook paper.  Fun!  And I estimate my total cost at maybe $5...$2 for the rack (yard sale) + $2 worth of spray paint + a few cents for the costs of the scrapbook paper, sandpaper, brads and glue.

Maybe spring lurking right around the corner is another reason to keep this piece fresh, bright and shiny as a new penny...to remind me spring with all its new beauty will replace winter blahs and cold soon.

Linking up to these great linky parties:


 Beyond The Picket Fence

post signature

Sunday, February 20, 2011

Antique Photo Frame Repair and Update

My grandma had her sister's picture in a frame like this for years.  Like a
cheval mirror, it could tilt forward or backward on the arms of the base. 
As I child I remember thinking my great-aunt must have been like a
 movie star to have her picture in such a fancy frame :) 
So, when I found this smaller version at a yard sale for
25 cents, naturally it had to come home with me.
  
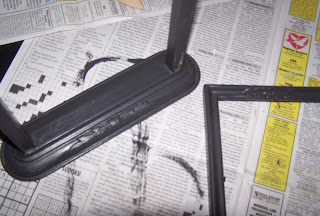
The frame was loose from the base because the screw holes had 
worn out, but it had some pretty little details...
 First thing, I filled the screw holes with wood putty and let it dry, 
then sanded those down smooth.
Next, a light all-over sanding and good cleaning, then a coat of dark acrylic 
paint as an undercoat - I mixed blacks and browns and even a bit of tan.
After the undercoat dried I brushed on two coats of warm white acrylic craft paint.
After distressing with a bit of sandpaper, plus a light glazing in a warm brown (most
of which was wiped away), it was ready to be re-attached to the base.
Using my teeny-tiniest bit I drilled pilot holes just above where the
original screw holes had been.  I put the screws and tiny washers
 on and it all went back together perfectly.  The glass had 
been cleaned and it was ready for a photo!
Good thing I was able to scan a photo and print it to the correct size - this is
by no means standard at 6" x 8 1/2"!   That lovely young newlywed
 couple in the fuzzy 1940-something photo, were preparing
to embark on their honeymoon as well as a lifetime
together - my mother and daddy.
They still look like movie stars to me :)

Linking to:


Beyond The Picket Fence
post signature

Wednesday, February 16, 2011

From Fishy to Fabulous

Somebody, somewhere, sometime thought this was a neat design for this little coat hook rack. When I saw it at a yard sale last summer I knew those black porcelain knobs were way too spiffy for a "Gone Fishin" plaque! Giant blunt fish hooks would have been fun...but I'm not really into the huntin' and fishin' look in my decor anyway. So, an easy update was in order....
A little painting and distressing, plus some pretty scrapbook paper cut and modge-podged to the center panel and it's done! I did remove the hooks first so I wouldn't get paint on them. Then I lightly sanded to rough up the surface. I wiped it down with a soft cloth to remove any dust, and slapped on a bit of black acrylic craft paint around all the edges and let that dry. I mixed some blue, green and white acrylic paints until I got the robin egg blue I wanted and brushed that on. Once the blue was dry I distressed it by rubbing with a little sandpaper and some steel wool - letting both the black and the original red show through here and there.
The final step was decoupaging the scrapbook paper on to the front panel. The paper wasn't wide enough to reach from end to end so at first I cut a decorative shape on each end. But, I didn't like the look so I just cut a couple more pieces and added them to each end to fill in the entire panel. Looks much better! I've been debating whether to add some kind of accents. But I really like this look. What do you think? Should I add something? And if yes, then what/where?Right now it hangs across from my pantry holding aprons, but I've got a couple other spots where it would look adorable too, so it may travel a bit.

Linking to my favorite linky party!
Beyond The Picket Fence

post signature

Wednesday, February 9, 2011

Easy Coffee Filter Wreath - made difficult :)

I know, I know - these coffee filter wreaths have been all over blog-land for the last year. That's about right for me...usually takes me a little while to jump on the bandwagon :) But I'm sharing the one I made last week anyway - because I love it!
Difficult isn't exactly the right word for this project, but as often seems to happen with me, I managed to add several steps to what should have been a super-fast, simple project! But I think it still turned out right for my taste, so, what's a little time, if the end result is great?

I wanted a more vintage/organic design - pure white is a bit too fussy for me. So off I went to buy unbleached filters. White was the only choice available, so I decided rather than go to several stores searching I'd just do white. But really - could I JUST DO pure white? Of course not. So I decided to tea stain the filters. I tossed a half dozen tea bags into a pot of boiling water and added the filters. I removed the pot from heat and let the filters "brew" for about 20 minutes and then spread them out to dry by our pellet stove. Any reason to spend time near the pellet stove right now, watching the flames dance while warming my tushie & toes, is welcome :)All 250 of them layered on my funky, chunky long table...looked kind of neat!
I had a straw wreath form I bought for 75 cents at a thrift store. I removed the plastic. Seemed like the right thing to do. Wrong. Straw bits were flying every direction when I touched it! Six of the coffee filters wrapped around the wreath and secured with hot glue took care of that issue. Not likely I'll buy straw again, but if I do, note to self - leave the plastic wrapper on!

Next I had to decide how to arrange the filters. The crimped look they had before their tea bath was pretty much gone. So I decided to fold each filter in half (sorry-didn't think to take pics of this part), then lightly fold in thirds, creating a fan shape. Then I hot-glued the point of the fan to the form. Repeat about 200 times, filling in as you go....and there you have it!
I knew before I ever started it would look perfect tied to this old frame - which set me back a whole 25 cents at a yard sale last summer. It's almost invisible in these photos, but the detail on the frame is really beautiful. And it was already naturally "distressed"!
And the burlap-ish ribbon was something I picked up on a whim a few weeks ago. Wasn't sure where I would use it exactly, but knew it was perfect for something!
My darling daughter-in-law has some great ideas for a statement wall using this...hopefully I'll get around to putting that together and posted before summer!

post signature

Related Posts Plugin for WordPress, Blogger...